Showing posts with label RV Living. Show all posts

Saturday, February 23, 2013

RV Renovations
Step 3
 
One of the weekend jobs we've had around here lately has been a fun one, but definitely one that has taken some time. We've been continuing on in the renovations of the RV. My husband and I were thinking the other night how IKEA should team up with an RV company and come up with an RV customizing line of products and/or ideas. It's definitely fun to walk through IKEA or visit their website to try and find good ideas in their small room living spaces, but it's definitely different when you're RV living and your walls are made of very thin particle board where you can't hang much on them due to lack of studs in the walls and support. But, we press on in search of things that help maximize our small spaces.  :)
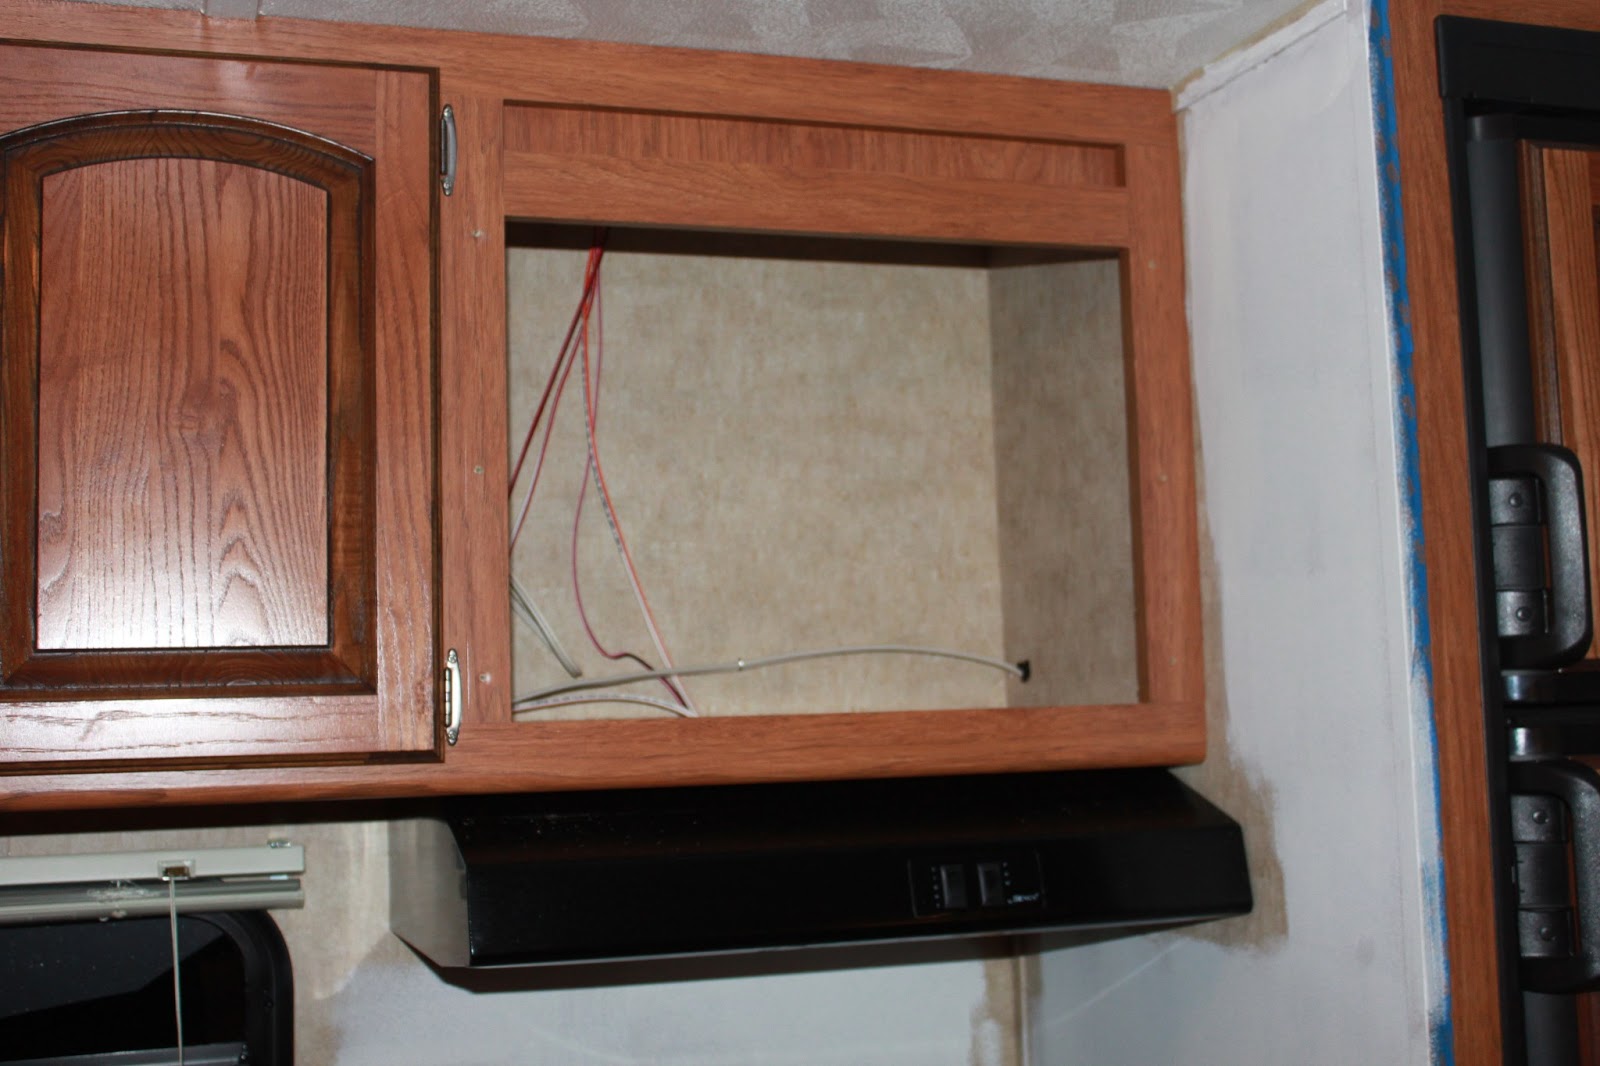
One of the first things we took out was the microwave. Since we don't use one and haven't in years, this was a great space that we'll most likely put a printer, cookbooks, etc. in. I made a curtain to cover the area (scroll down) and it turned out rather well I think.
 
 
In our RV Renovations - Step 2, we took out the table with benches and painted the walls a light blue to give it a fresh feel. It turned out really well and we love the color. Goes with just about anything.
 
 
We decided to take out the bed in the master bedroom due to the fact that it took up so much space and for now, Isaac sleeps in there. When he's big enough for one of the lower bunks in the kids' bunk room, we'll move him in, but he's got a little more time. All of our children go to bed at 7:30 and that leaves Rob and I with time to ourselves as the Littles are all tucked into their beds.
 
Here's the room, minus the bed now. The line in the carpet is where the slide out opens and closes. There's so much space in the room now and it gives us another room to use, which is huge. Rob also gutted out the wooden "night stands" that were on the sides of the bed. This room will be the nursery/spare room/school room (aka: "the everything room")
 
Isaac..."Hey! Where'd the bed go?"
 
 
We've added some small, organizational things that help keep things in their place. We added the key rack for 5 or 6 bucks from Target.
 
 
Some magnetic spice racks from Bed, Bath and Beyond (or IKEA has them too, I think) for a few dollars each. There's no room for a spice rack, that's for sure. Every bit of the pantry has to be utilized for food.
 
 
Found this little find at the Dollar Store. Can't beat a buck! It even has 7 hooks...perfect-o.  :)
 
 
One thing that we feel so blessed to have is a bathtub in the RV. So many don't come with them, only showers. When you have kids, especially little kids, baths are abundant. (Sometimes, it's how I get school done with keeping the littlest two busy in there with water toys.) The only thing I don't care for is this small crack that does leak water into the kitchen. Only when splashing occurs though. So we have to find a solution to this itty-bitty problem which has the potential to get bigger.
 
 
Isaac watching as Rob took out the bedside "night stands".
 
 
 Curtains I sewed. I looked at various stores, but didn't find anything subtle that had a bit of a pop to it. So it was off to the fabric store I trotted. I wound up making them with a lining on the back for extra darkness when needed. I got the fabric 40% off and they even let me use my teacher's discount card of an extra 15% off. Nice. (If you do home educate, bring the response letter you get back from your state into Jo-Ann Fabrics and they'll give you a teacher discount card you can use ON TOP of your other coupons.)
 

This couch replaced the bed. It's a pull-out couch with some storage underneath and washable slip covers. We didn't want to spend money on a new couch, but nothing else that we scouted out or tried to fit, would. It's a very small space and standard loveseats don't fit. This one did however. We're planning on having a yard sale for our house furniture so I'm sure we'll make the money back. Right now, it's rock hard, but nothing a few children jumping on it can't fix. The one time I allow them to jump on a couch...ha!


I added more curtains to the two small windows for more color. This is our dresser (yep, one drawer for each of us) and we're going to either use the top counter for a changing table pad or my sewing nook. We shall see.  :)


We added magnetic knife racks to keep out of the reach of little hands as well as a rail and some hooks for cooking utensils (not yet added). We also used the same rail with some clear, plastic cups for toiletry storage in the bathroom (forgot to take a picture). We used a towel rack in the bathroom as well for towel storage above the toilet.


The curtains I sewed to add some color.


A few wall pictures and hooks for purses, bags, etc.


We took our couch from the living room (a pull-out) and made it our bed in the living room. It's quite comfy and snug and we're able to fold in the comforter inside the couch during the day. Not having to store extra stuff is a big deal. We actually had to saw off the top to get it into the door, but nothing a little wood glue and staples couldn't fix. We put the slip cover over top and you wouldn't even know it unless we told you (so pretend you don't know if you ever sit on it...tee hee).


The view from the living room. Not having the view of the bed definitely makes things look bigger.


We added a rug (clearance...score!) to mop up the constant spills next to the sink and fridge.


I hope you enjoyed the third chapter of our RV renovation. Consider it gold if you find a website that has some good tips like this because there isn't much out there. I've looked. It's always a bonus when others have done the work for you, right?

I'm not a huge Pinterest person, but in this case I Googled "RV renovations and organization" and found a bunch of things on Pinterest as well as Families On the Road. The Happy Janssens had a fun tour as well as We Choose This Life, 4 Little Men and Girly Twins and Bliss and Life.

Blessings to you all!!!

Tuesday, September 11, 2012

RV Renovations: The Beginning
 
I hesitate to share this just yet, but as per request from a sweet friend, I'll just do the renovation posts in steps as we go. For those just now jumping in, our family recently ( a few months ago) purchased an RV.We had thought about building a temporary home (such as this) as we build, but an RV gives our homeschooling family a chance to travel and learn about our country (eventually...right now, we've stuck to local camping trips) and take our home on wheels.
 
Our family has been working very hard at getting out of the debt we had and praying we can get to a point where we're living out of our RV on a purchased piece of property (preferably 20 + acres with a fresh water source, good grass, old shade trees) while we set up our full-working, sustainable farm and build our home from the ground up, DEBT-FREE and monthly-bill-friendly. We got to a point two years ago where we realized we didn't want to live to work, but work to live (you know the drill, work the 8-6 everyday only to pay the bills, get up and do it all over again), supplying more of our food needs, home educating and not relying on the government or a "system" to supply our every need. What started out as a dream has slowly (weaning is key with large lifestyle changes...cold turkey can be dangerous and prone to failure) become a reality through much prayer and searching for what God Almighty wants to use our family for.

Okay, so here's the RV and our renovation steps as we look to make it like a home...
 
Step #1:
 We don't have a large budget for renovating our behemoth, so I have to really think "thrifty" on this one. Here are two magazines and one book that I'm using, the one on the right being my absolute favorite with tons of DIY, cheap but adorable ideas on how to spruce things up. My style is vintage country. {luv}
 
 I have a section for "moving" in my Home Management Binder where I keep notes for the RV renovations, as well as house building notes. I kept my nifty IKEA catalog handy for space-saving ideas.
 
 
 Here is the dining room "before" photo. Don't you love the border? :)
 
 Rob and Isaac to the rescue with some power tools and muscles!
 
 ...going, going, GONE!

I'm on the hunt for a fun, old table and some mismatching chairs. I'm going to put a bookshelf on the small wall with the small window.
 
 We took out all of the nifty, brown valances throughout the RV and I'm on the hunt for some fun curtains. I found some great fabric the other day, but it will be more costly to make them. Coupons...I'm on the hunt for you. :)

Plan B...IKEA has some fun curtains here we're considering.


walls are primed


little helpers


...still helping...


...and still helping.


Living/Dining Room walls are painted


Lovin' the new color. We chose a light blue so that it would open the space up a bit. We'll be accenting with reds and blacks mostly. I found some really cute photos here...


The next step is to finish up the bathroom (same blue color) and paint the kids' room a fun green. We'll be painting our room, but unsure of the color as of right now. Stay tuned for future RV renovations here at Vine Living.


Sunday, April 22, 2012

Our New Home-On-Wheels
As our family continues to look for land (as we feel that this is God's calling for our family), we felt lead to purchase this new "rig". This helps us bring down the cost for when we move. A piece of land with no house is almost always cheaper than a piece of land with a home already placed on it. Thus, we have our home-on-wheels ready so that when we do find a buyer/renter for our home and we purchase our property, we will already have our temporary home. We're planning on building a home on our property and doing it ourselves to save on cost. We've looked at a variety of options and continue to research what kind of home kits/log cabins, etc. are available to build. Lots to think about, research and pray about as we look for God's will for our lives. Please keep us in your prayers and that ultimately sums it up. We want GOD'S will for our lives and not our own.

The front door

The bunk room with four bunks (one for each child). The bottom bed on the right has a large storage area for toys, blankets, etc. The closet is small, but doable. The boxes on the top of the closet are for school books and learning materials. We'll probably be using Isaac's top bunk for toys for now until he's old enough to sleep in a large bed. He'll be in our room in a pack-n-play for awhile.

Lincoln (top) and Avonlea's bunks (I'm planning on making some curtains to match the bedding)

Isaac's bunk (top...which will be moved down low when he's ready, obviously) and Norah (bottom)

Walking in from the front door...couch, table and kitchen. There's storage under the couch (which pulls out into a bed) and storage under the table seats (for school books) which also makes a bed. There's also storage above the couch for more books, supplies, etc. I have to admit, I've begun parting with school "stuff" lately and although it feels good, some things I just can't part with. We'll probably have to rent a POD on the property for extra storage. We've also decided that an air conditioned barn will be built first on the property to hold animal feed, hay, a washing machine, an extra refrigerator, kitchen for canning, dairy and farm/kitchen jobs and a storage loft.

Our bedroom (I'll be making more curtains for this room too...not crazy about the brown)

Our small dresser, tv and closet. There is storage under the bed too which is wonderful. I do love that it has tons of windows, especially in this room. It makes it feel bigger and when they're all open, the breeze is wonderful!

Itty-bitty bathroom! Looking for a cheap, colorful shower curtain. There's even a sky-light in the shower which is neat.

the pantry...not huge, but luckily there's extra storage all around the RV so we'll store back-up, non-perishable groceries in those areas.

The kitchen...gas stove, a pop-up extra counter by the sink, small oven to fit maybe two loaves of bread, but at least we have one! The fridge and freezer are also small, but again, we're hoping to get a barn built first that will have an extra large refrigerator/freezer in it.

Main living area

It has a roll-out awning and we're planning on making a screened in deck attached to it when we finally park it on the property. It will help make it more livable with extra space. There are electric hookups on the outside of the RV which will allow for a washer to be placed on the deck. We'll have to line-dry of coarse, but that's nothing new. :) (I am, however, a wee-bit nervous about line drying with rainy season officially here now in Florida.)

Extensions to help with more space. While driving, all of us will have to be in the car (only in motor homes can you be actually inside) and these nifty extensions fold in.

The new car (we call it "the school bus"...how appropriate, right?!) that has the capacity to pull the behemoth and sit all of us comfortably. It's 11 years old, but still looks good. :) Our Explorer has a third row and seats as many as a mini-van, but we were getting pretty cramped (it's much smaller than a minivan). This is such a blessing and the fact that there are no payments on it (they did a clean swap-out for our truck) was our main goal. God had the perfect one waiting for us at the dealership. It's very weird (and totally awesome) to have trunk room now as I used to have nothing. A huge blessing.