RV Renovations
Step 3
One of the weekend jobs we've had around here lately has been a fun one, but definitely one that has taken some time. We've been continuing on in the renovations of the RV. My husband and I were thinking the other night how IKEA should team up with an RV company and come up with an RV customizing line of products and/or ideas. It's definitely fun to walk through IKEA or visit their website to try and find good ideas in their small room living spaces, but it's definitely different when you're RV living and your walls are made of very thin particle board where you can't hang much on them due to lack of studs in the walls and support. But, we press on in search of things that help maximize our small spaces. :)
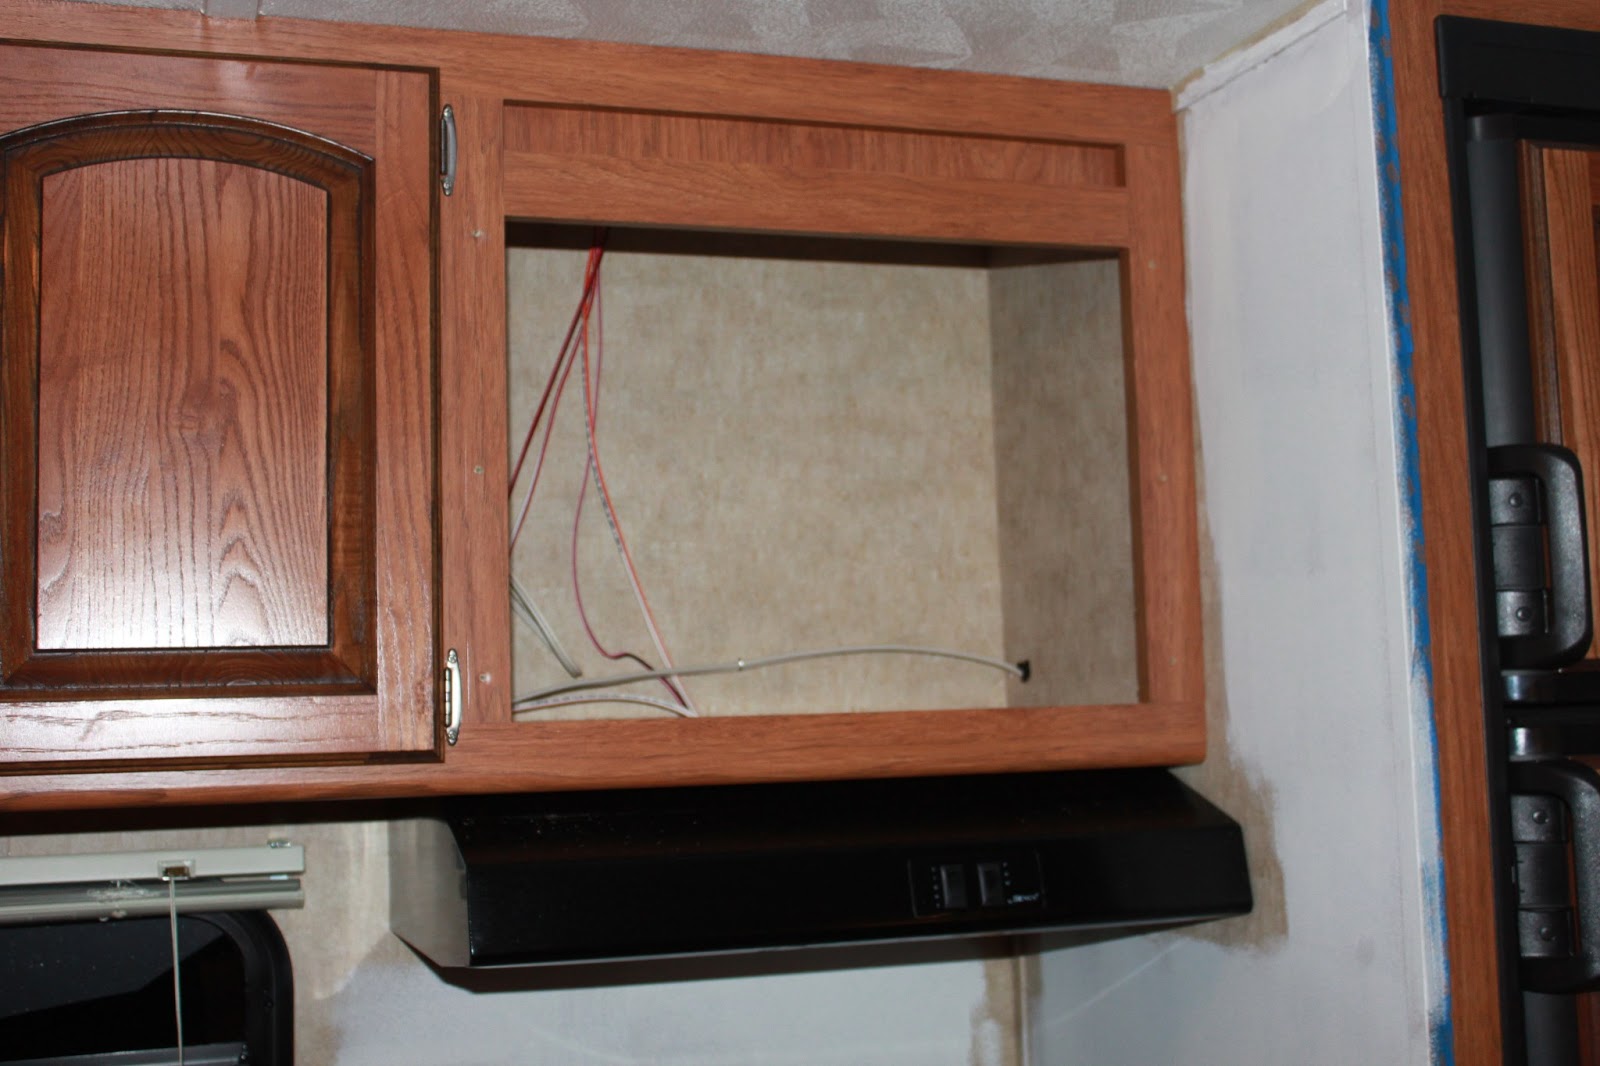
One of the first things we took out was the microwave. Since we don't use one and haven't in years, this was a great space that we'll most likely put a printer, cookbooks, etc. in. I made a curtain to cover the area (scroll down) and it turned out rather well I think.

In our RV Renovations - Step 2, we took out the table with benches and painted the walls a light blue to give it a fresh feel. It turned out really well and we love the color. Goes with just about anything.

We decided to take out the bed in the master bedroom due to the fact that it took up so much space and for now, Isaac sleeps in there. When he's big enough for one of the lower bunks in the kids' bunk room, we'll move him in, but he's got a little more time. All of our children go to bed at 7:30 and that leaves Rob and I with time to ourselves as the Littles are all tucked into their beds.

Here's the room, minus the bed now. The line in the carpet is where the slide out opens and closes. There's so much space in the room now and it gives us another room to use, which is huge. Rob also gutted out the wooden "night stands" that were on the sides of the bed. This room will be the nursery/spare room/school room (aka: "the everything room")

Isaac..."Hey! Where'd the bed go?"

We've added some small, organizational things that help keep things in their place. We added the key rack for 5 or 6 bucks from Target.

Some magnetic spice racks from Bed, Bath and Beyond (or IKEA has them too, I think) for a few dollars each. There's no room for a spice rack, that's for sure. Every bit of the pantry has to be utilized for food.

Found this little find at the Dollar Store. Can't beat a buck! It even has 7 hooks...perfect-o. :)

One thing that we feel so blessed to have is a bathtub in the RV. So many don't come with them, only showers. When you have kids, especially little kids, baths are abundant. (Sometimes, it's how I get school done with keeping the littlest two busy in there with water toys.) The only thing I don't care for is this small crack that does leak water into the kitchen. Only when splashing occurs though. So we have to find a solution to this itty-bitty problem which has the potential to get bigger.

Isaac watching as Rob took out the bedside "night stands".

Curtains I sewed. I looked at various stores, but didn't find anything subtle that had a bit of a pop to it. So it was off to the fabric store I trotted. I wound up making them with a lining on the back for extra darkness when needed. I got the fabric 40% off and they even let me use my teacher's discount card of an extra 15% off. Nice. (If you do home educate, bring the response letter you get back from your state into Jo-Ann Fabrics and they'll give you a teacher discount card you can use ON TOP of your other coupons.)

This couch replaced the bed. It's a pull-out couch with some storage underneath and washable slip covers. We didn't want to spend money on a new couch, but nothing else that we scouted out or tried to fit, would. It's a very small space and standard loveseats don't fit. This one did however. We're planning on having a yard sale for our house furniture so I'm sure we'll make the money back. Right now, it's rock hard, but nothing a few children jumping on it can't fix. The one time I allow them to jump on a couch...ha!

I added more curtains to the two small windows for more color. This is our dresser (yep, one drawer for each of us) and we're going to either use the top counter for a changing table pad or my sewing nook. We shall see. :)

We added magnetic knife racks to keep out of the reach of little hands as well as a rail and some hooks for cooking utensils (not yet added). We also used the same rail with some clear, plastic cups for toiletry storage in the bathroom (forgot to take a picture). We used a towel rack in the bathroom as well for towel storage above the toilet.

The curtains I sewed to add some color.

A few wall pictures and hooks for purses, bags, etc.

We took our couch from the living room (a pull-out) and made it our bed in the living room. It's quite comfy and snug and we're able to fold in the comforter inside the couch during the day. Not having to store extra stuff is a big deal. We actually had to saw off the top to get it into the door, but nothing a little wood glue and staples couldn't fix. We put the slip cover over top and you wouldn't even know it unless we told you (so pretend you don't know if you ever sit on it...tee hee).

The view from the living room. Not having the view of the bed definitely makes things look bigger.

We added a rug (clearance...score!) to mop up the constant spills next to the sink and fridge.
I hope you enjoyed the third chapter of our RV renovation. Consider it gold if you find a website that has some good tips like this because there isn't much out there. I've looked. It's always a bonus when others have done the work for you, right?
I'm not a huge Pinterest person, but in this case I Googled "RV renovations and organization" and found a bunch of things on Pinterest as well as Families On the Road. The Happy Janssens had a fun tour as well as We Choose This Life, 4 Little Men and Girly Twins and Bliss and Life.
Blessings to you all!!!

1 comment:
Wow Kelli! It looks great!! It makes me wish I was still in my home with a hitch so I could have kept working on it. Love your colors and ideas, and the bed removed does add lots of space! That was a great idea.
Post a Comment